
 |  |  |  |  |  |
About Me

- Rachel White
- I'm an artist who can't choose a medium. My current weapon of choice is a black fine line art marker, which I use to doodle pretty little illustrations. I turn them into clip art that you can purchase in my Etsy shop for use in projects like web design and scrapbooking. I live with my husband and evil black cat in Chicago.
Wednesday, August 31, 2011


Sunday, August 21, 2011
WIP: Houndstooth Quilt
 |
| Houndstooth Quilt squares, WIP |
I am going to sell this on Etsy when I'm finished. (*I will not keep this quilt. I will not keep this quilt. I will not keep this quilt.*) Right now I'm estimating that it's going to cost somewhere in the $500 dollar range. I will keep my blog updated as to my progress.
I'd love to be able to take custom quilt orders (maybe just one or two a month). I think the houndstooth quilt would look amazing in unexpected colors. Like aquamarine or raspberry.
Wednesday, August 17, 2011
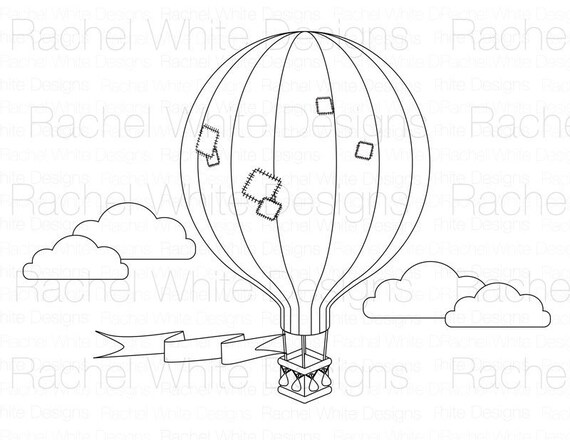
Owl with Headphones Digital Stamp
 |
| Owl with Headphones Digital Stamp |
I think my favorite part of this digital stamp making thing is printing out the image and then coloring it in so people can see what it will look like as a finished product. It's very soothing.
You can get this stamp for yourself in my Etsy shop.
Boldly Go Wristlet
 |
| Boldly Go Wristlet |
This wristlet makes a great gift for yourself or for your favorite geeky friend. Wristlets are perfect for running errands or a night on the town - anywhere you don't want to haul around a big purse.
I have two made and ready to ship! You can get one for yourself at my Etsy shop.
Tuesday, August 16, 2011
Reindeer Digital Stamp
 |
| Reindeer Digital Stamp, Colored Pencil |
So yesterday I decided that I needed to have a plan. A plan that I would stick with and would make the daunting prospect of diving headfirst into a crafting area I'd never explored not so daunting. So I cut up some paper into tiny squares and wrote down a prompt on each of them. Every day I will reach into my prompt bucket and draw whatever it says. Today my prompt was reindeer.
I love his expression. Its like he's saying, "WOT?" but he's also excited about it, because his tiny tail is wagging.
I printed him out and colored him with standard Crayola colored pencils, because I figured people would want to see what he could look like colored in. It's prettier than seeing the watermarked line art.
You can get your own Reindeer Digital Stamp from my Etsy shop.
Monday, August 15, 2011
Screen Printing

They are both fandom designs (and both spaceships... hm). One of the Enterprise which says, 'Boldly Go', and the other is of the TARDIS and one of my favorite Eleven lines, 'Come along, Pond.' And they both turned out so well!
My 'screen printing' method is more of a fancy stencil, but it's going to last longer. This is how I did it:
You'll need:
- small embroidery hoop (get the cheapest ones you can find)
- sheer fabric (but woven tightly enough that it will hold the Mod Podge. I got 'bridal organza' out of the remnant bin, and it worked perfectly for my fine detailed designs)
- Mod Podge
- tiny paintbrushes (your choice)
- your black and white design printed to a size that fits well within your hoop
- a fine point Sharpie
- tape
- light body acrylic fabric paint (I think it's actually used for air brushing)
- a stiff bristled brush
Fit the sheer fabric in the embroidery hoop, cut off excess, but leave about an inch all the way around. Tighten.
Put rolls of tape near top and bottom of your design, and press the hoop face side down onto the paper. The tape is just there to hold it in place while you draw.
Trace your design with the Sharpie. I like to stay inside the lines, that way I know exactly how far my Mod Podge should go. Be patient and do this part right. It will make the painting easier.
Remove paper design and tape from hoop. Mod Podge all the areas of your design that you don't want to be screen printed. This is where fine tip paint brushes come in handy. I found it helped to hold my hoop towards a light. That way I could see the little holes I'd missed filling in, and it was easier to discern the edges.
Allow to dry. You may need a second coat if you missed lots of holes the first time.
Choose your screen print color, and with your stiff bristled brush get some paint on your brush and tap off excess paint on your palette. Apply brush in firm, short strokes to the bare areas of your design. Do not use too much paint - it will seep. When you feel the design is covered to your satisfaction (look at it from several directions in the light to see spots you missed (unless you're going for the weathered look, then just ignore me). Carefully lift up the hoop. Start with one side and keep lifting in that direction. If you aren't careful your design will smudge.
And that's it!
I started with the Enterprise. I didn't have Mod Podge then, so I was using acrylic gel medium with some yellow paint mixed in so I could see where I'd painted already. It worked, though I had to use two coats. I was able to find Mod Podge at the grocery store (miracle!), and used it for the TARDIS. The Mod Podge just worked better. I only had to do one coat.
I'm going to use both of these designs to make little wristlets to start with. (I love my TARDIS wristlet. I've been taking it everywhere, and everything I need fits inside it - so I want more wristlets.) I'll likely use my screen print designs on other things later. I'm really pleased with how they turned out! I will definitely be making more of them in the future.
(Note: I have no idea why the photograph looks like that. I must have done something weird while I was editing it.)
Friday, August 12, 2011
Police Box Wristlet
 | |
| Police Box Wristlet |
It measures 6 1/2 x 4 inches, rocks appliqued details, a decorative button, and (though not seen in the photo) very timey whimey lining fabric.
I made the prototype of this design yesterday, and all was going well, but I screwed up the liner at the very end. Lesson learned, I maximized my productivity today and attempted to make three of these babies at once. I was only able to make two (I ran out of timey whimey lining fabric and zippers), and the second one (not pictured) came out perfect.
You can get your own Police Box Wristlet at my Etsy shop.
Wednesday, August 10, 2011
Harry Potter Ornaments
 |
| Harry Potter Ornaments |
Today my project was to make Harry Potter themed ornaments. As you can see I went all out. (Not pictured is a Golden Snitch ornament, which is currently in the process of wing attachment via craft glue. It's taking it's sweet time to dry.)
The Gryffindor Crest has a raised lion on a crimson backdrop, surrounded by a fuzzy golden glow.
The Sorting Hat turned out awesome, though it's hard to tell in the photograph. It looks like it's laughing! And the patches add a sweet sort of charm to it.
The Lightning Bolt is simple, but I like it. That is a lightning bolt with attitude.
Hedwig is my favorite. I've made owls in this style in the past (remember my wedding cake toppers?), and I think it works really well here.
These were all made with polymer clay (Sculpey III), stuffed with aluminum foil when necessary, and the metal loops are made from parts of paper clips.
I'm going to sell these as a set on Etsy. When I figure out how it works, and how to post things for sale, and what the heck I should charge, I'll put a link up.
Subscribe to:
Posts (Atom)